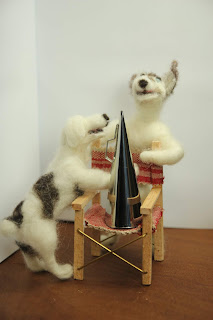
This is part of an ongoing project of making props and extras for our stop motion dolls' house film. The animation centres around an Edwardian dolls' house. This contains original mainly Arts and Crafts fixtures, fittings and furniture and dolls and toys from the Victorian era and up to the 1920s.
In order to supply the narrative, I am adding characters and at the
moment I am using needle felting to do this. I have already made a
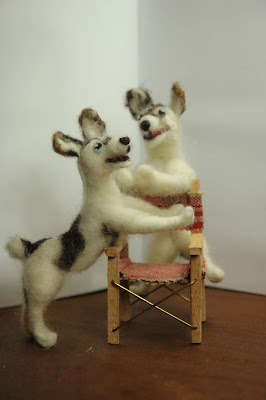
collie cross dog, who is to be one of the major characters and his stunt
double who is also the director of the film. This dog replaces the one I
remember being in the dolls' house in my childhood but which over the
years has 'gone walkabout'.
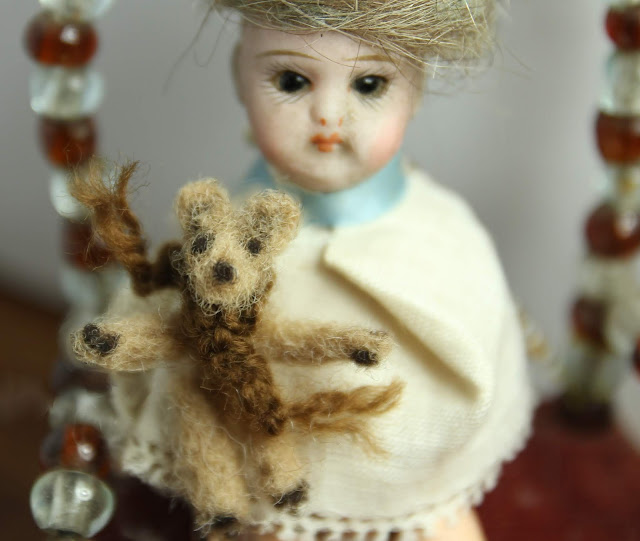
The new Teddy bear is for the doll we have identified as being manufactured by François Gauthier (later Gaultier) and from the mark as being made between 1887 and 1900. Although it is quite difficult to see without a hand lens, the doll carries the company's scroll mark ‘F.G.’.
The new Teddy bear is for the doll we have identified as being manufactured by François Gauthier (later Gaultier) and from the mark as being made between 1887 and 1900. Although it is quite difficult to see without a hand lens, the doll carries the company's scroll mark ‘F.G.’.
Foreword & Provenance - Our Dolls' House Dolls

 Gautier started in dolls’ head production in 1860 on the outskirts of
Paris, along with the usual fashion and baby dolls he made bisque heads
for the small dolls' house dolls, known as Mignonettes.
Left: Gaultier-headed Bridal Fashion Dolls (Pinterest - Muriel B and Angélique Sablayrolles, respectively)
Fashion dolls were the way in which potential customers, particularly
those who lived abroad, could view the latest Paris fashions on mini
models. It was important that the dolls should look their best and the
inclusion of real wigs and glass eyes was crucial. Fashion dolls were
such a key commodity and passion, in particular for the aristocratic and
royal families of Europe, that even during wars and trade embargoes
they continued to be exported under special passports and often armed
guard!
Gaultier perfected and patented a process for making the moulded heads with the eye sockets already cut out, an otherwise tedious process and which gave him an advantage over his competitors.
Our doll (below) is in definite need of a make-over! She has obviously been very much loved but it has definitely taken a toll on her appearance. She is also in need of a new pate - this is the moulded cork 'stopper' which goes inside her head and supports the wig. Luckily we have a recycling solution from our seasonal festivities
Needle Felting the Teddy Bear - Design, Technique and Materials
The technique used in needle felting is to get the wool, which is naturally barbed to pull itself together into a shape or flatten itself out with the motion of the needle thus by felting (or in the vernacular, stabbing in and out of) the wool. It is actually very much like using the pressure of your fingers to shape clay. Leaving an unfelted fringe-type end to a shape allows you to join elements of your design together, such as the head to a body but in this case I am going to 'joint' my bear by running a thread through the main elements, i.e., the body, head, arms and legs.
 For the Teddy Bear I've decided to use the 'knot and wrap' method to make solid shapes for the body and head. I am then going on to make some simple individual, folded and/or rolled needle-felted shapes to construct the arms, legs and ears. This is a technique I learned from watching a needle felting professional. If you are new to needle felting, as indeed am I, then I suggest at some point you head over to the YouTube channel of Serafina Fiber Art and take a look at her tutorial 'Bunny Puff', which is a great starting point and one of her signature designs. This is the first project I tried out when I started to learn the craft/process and I liked her work because she uses the wool much as a sculptor uses clay. Above you can see the starting point, of my bunny project, above left the head and body joined and below the outcome. For the bunny I used Organic Merino Top, White Jacob Sheep Top and a bag of Scoured Mixed Jacob Fleece Wool, which I sourced from Cumbria in the UK. Jacob Fleece is a great way to get some nuanced shades of natural wool.
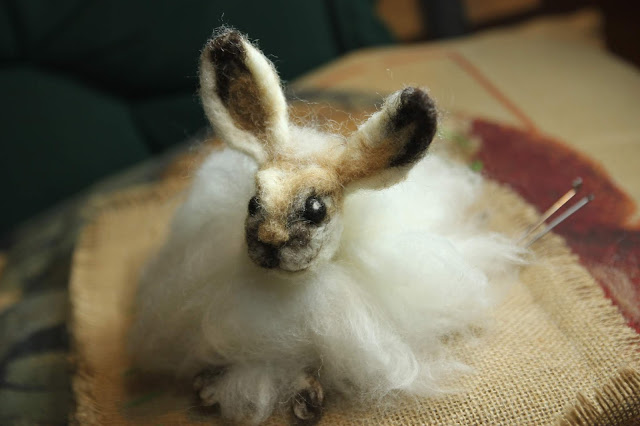
 For the Teddy Bear I've decided to use the 'knot and wrap' method to make solid shapes for the body and head. I am then going on to make some simple individual, folded and/or rolled needle-felted shapes to construct the arms, legs and ears. This is a technique I learned from watching a needle felting professional. If you are new to needle felting, as indeed am I, then I suggest at some point you head over to the YouTube channel of Serafina Fiber Art and take a look at her tutorial 'Bunny Puff', which is a great starting point and one of her signature designs. This is the first project I tried out when I started to learn the craft/process and I liked her work because she uses the wool much as a sculptor uses clay. Above you can see the starting point, of my bunny project, above left the head and body joined and below the outcome. For the bunny I used Organic Merino Top, White Jacob Sheep Top and a bag of Scoured Mixed Jacob Fleece Wool, which I sourced from Cumbria in the UK. Jacob Fleece is a great way to get some nuanced shades of natural wool.





No comments:
Post a Comment